




Access Denied
IMPORTANT! If you’re a store owner, please make sure you have Customer accounts enabled in your Store Admin, as you have customer based locks set up with EasyLockdown app. Enable Customer Accounts

How to Make Halloween Jewelry: DIY Earrings, Bracelets & Charms
Posted By AccswholesaleBlog
on
Halloween jewelry is easy to make when you match each design with the right components. For quick earrings, attach lightweight, looped charms to appropriate earring findings; for bracelets, string drilled beads on compatible cord; for necklaces, connect charms to a chain or cord with secure, properly sized connectors. Choose a simple color palette, check each attachment, and keep small parts away from young children. A separate Italian charm system uses linked modules rather than ordinary beads or hanging charms.
Key Takeaways
- Start with a bracelet if you want a straightforward beginner project: drilled beads, compatible elastic cord, and a secure knot are the essentials.
- Choose a charm with a usable loop or hole before planning an earring or pendant. A decorative piece without a suitable attachment point is not automatically ready to wear.
- Open jump rings sideways with two tools rather than pulling their ends apart; close them flush before wearing the jewelry.
- A 9 mm Italian charm module belongs in a compatible expandable-link bracelet system, not on ordinary stretch cord.
- Check the materials and connections of every finished piece, particularly if you intend to give or sell it.
What Supplies Do You Need to Make Halloween Jewelry?
Before purchasing supplies, decide on the finished object instead of starting from a photograph of an attractive bead. Write a short bill of materials for one piece: the focal decoration, the material that supports it, every connector, and the finishing component. An earring may need an ear wire and connector that are not included with the charm; a necklace may require a separate bail and clasp. Make a small sample using your chosen cord or findings first. This prevents a package of seasonal decorations from becoming stranded inventory simply because the necessary fitting part was not considered.
Keep a ruler beside the workspace and check the size of openings against the actual cord or wire you intend to use. Hole size is not the same as the outside width of a bead. Likewise, a charm's overall height does not reveal whether its loop is accessible when hanging on a finished chain. When a listing omits one of these dimensions, ask for a measurement or inspect a physical sample rather than writing a guessed compatibility claim into your plan. Set out all parts on a clean, well-lit surface, and keep small pieces in a shallow tray so nothing rolls away.
For many beginner projects, gather Halloween-themed beads or charms, jewelry pliers, compatible jump rings, and the stringing or metal findings suited to the item you plan to make. Ear hooks or posts are for earrings; chain, a clasp, and connecting rings are used for many necklaces; elastic cord and drilled beads are commonly used for stretch bracelets. You may also need a ruler, flush cutters, bead stoppers, and a small amount of adhesive designed for jewelry knots, depending on the cord manufacturer's guidance.
Do not assume that every decorative Halloween component is interchangeable. A bead with a through-hole can be threaded only if the hole fits your cord and the design sits comfortably. A flat silicone focal bead intended for another craft application may not suit a wearable design without checking its hole and dimensions. A resin charm with a top loop may suit a pendant or dangle, but its weight and loop strength still need checking.
AccsWholesale carries several kinds of Halloween craft components. Its Halloween pumpkin acrylic beads have a bead-style through-hole in the supplied product image; the spiderweb acrylic beads provide another visual option. Both are bead components, not complete jewelry-making kits.

How Do You Make Halloween Charm Earrings?
A useful dry run is to assemble the design without permanently closing the final connector. Hold the earring up in the position it would be worn and check the orientation: a pumpkin's face should point outward, two ghosts should hang in matching directions, and the decorative part should not rotate into the side of the ear. Check for unnecessary weight. A decorative charm that looks small in a flat photograph may still be too heavy or awkward when attached to an ear wire. If it cannot be verified as light enough and securely attached, choose a different component or save it for a bag charm or another non-earring project.
For matching pairs, do not assume every mixed pack contains a duplicate of each style. Sort the available motifs into pairs before opening findings. Also check metal-contact claims independently: a retail label saying "fashion accessory" does not confirm that a hook meets a specific sensitivity requirement. Keep the ear-contact finding's verified material information with your project notes if you plan to gift or sell the earrings. The objective is a practical, securely assembled pair, not simply two charms that look alike in a photo.
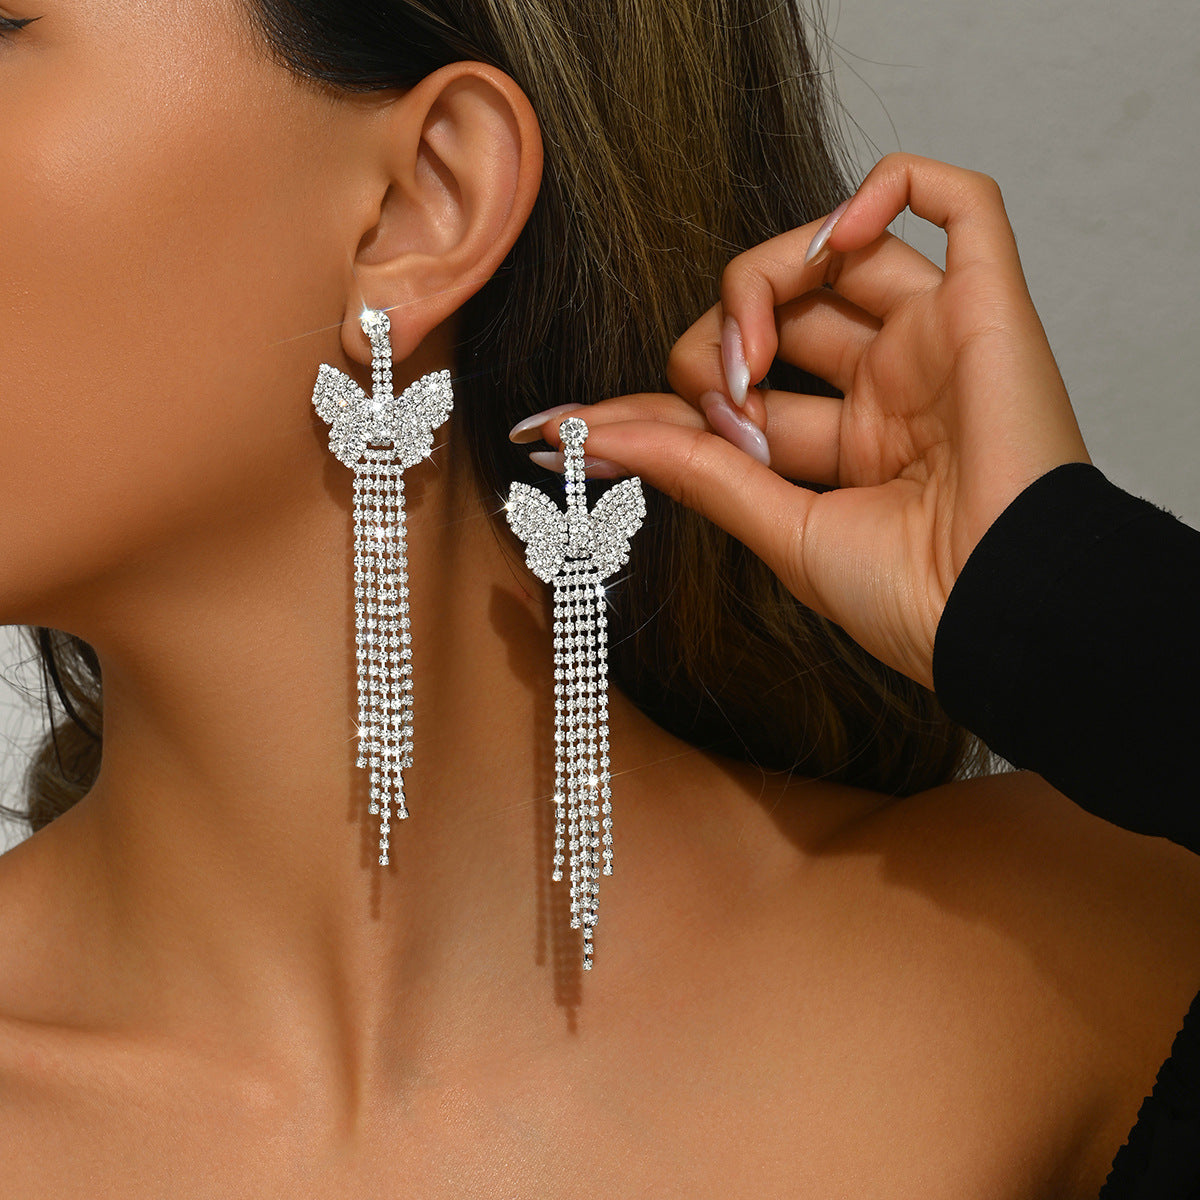
For simple dangles, use two lightweight charms with verified top loops, two appropriate earring hooks, and two properly sized jump rings. Match the size of each connector to the charm's loop and the hook's attachment point. Use suitable jewelry pliers.
- Place two matching charms side by side to check that their size, weight, and orientation agree.
- Grip each jump ring on opposite sides of its opening with two pliers. Rotate one end toward you and the other away; do not stretch the circle open.
- Slide the charm loop and earring-hook loop onto the open ring. Check that the charm faces forward when hanging.
- Rotate the ring ends back together until they are aligned without a visible gap. Repeat on the second earring.
- Hold each finished earring over a soft surface and gently inspect every joint before wearing it.
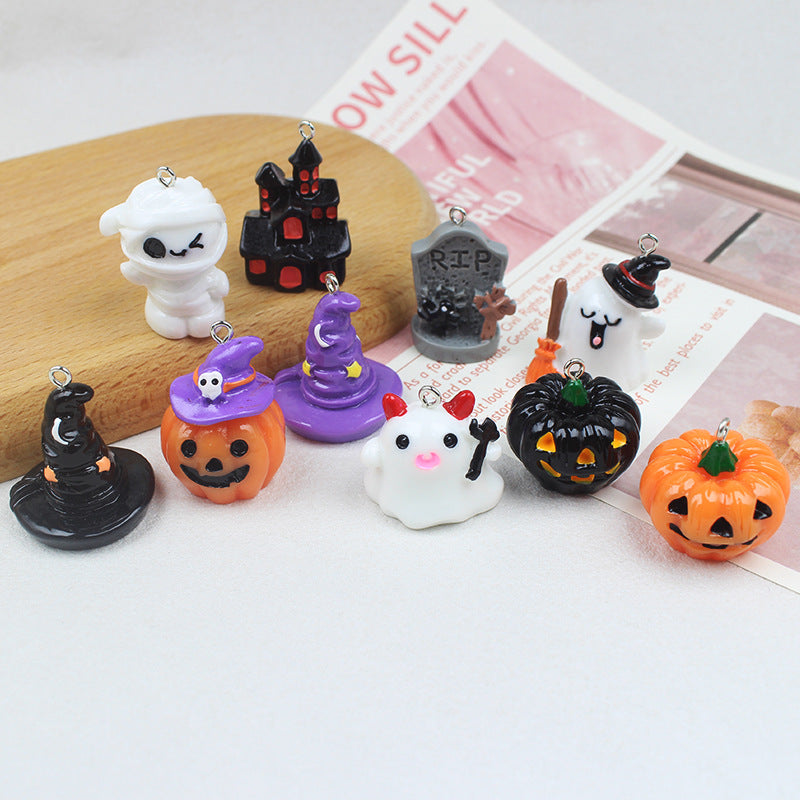
For example, Halloween-themed resin decorations with hanging loops may be candidates for a lightweight dangle design after their weight, attachment hole, and skin-contact findings are checked. The photographed ghost and pumpkin resin charms are examples of decorative components—not a claim that every variant has been tested as an earring.
A clay ghost earring is a different project: it requires suitable clay, the clay maker's curing instructions, and a mechanically sound or appropriately bonded earring attachment. Do not substitute ordinary craft glue for a load-bearing connection without verifying the product's stated suitability.
How Do You Make a Halloween Beaded Bracelet?
Plan the layout with the actual diameter of the beads. Larger novelty beads occupy more space than small accent beads, so copying a visual pattern from a photo may produce a bracelet that is longer or more rigid than expected. A simple pattern can alternate one orange focal bead with smaller dark beads, but the final sequence must be adjusted to the wearer and the measured finished fit. If a focal bead has a shape that presses into the wrist, move it to a more comfortable position or leave it out. A bracelet is a wearable object, not only a color arrangement.
When tying elastic cord, follow the cord manufacturer's knot and finishing guidance rather than assuming one knot works with every stretch material. Some cords require pre-stretching or a particular finishing treatment; these details are product-specific. Before giving the bracelet away, check the knot after gentle movement and make sure the holes do not expose sharp edges that can abrade the cord. If one bead repeatedly catches or scratches the material, remove it. For a repeated batch, keep one fully assembled reference sample to compare against future pieces, especially the wrist fit, focal bead placement, and final knot.
A stretch bracelet is a practical first project because it does not require a metal clasp. Choose beads whose holes fit the cord, allow extra cord for knotting, and arrange the colors before stringing. Orange, black, purple, and white can create a Halloween pattern without adding a separate charm.
- Measure the intended wrist and check a reliable bracelet-sizing reference for an appropriate comfortable finished fit. The final cord and bead count depend on bead diameter and wrist size.
- Cut a working length of elastic jewelry cord that leaves enough room for threading and tying. Follow that cord manufacturer's recommendations on pre-stretching and knots.
- Lay out the bead sequence before threading. Check that holes are smooth and large enough for the selected cord.
- Thread the beads, leaving the cord ends free. Add a focal bead only if its hole and size work with the bracelet.
- Tie the knot recommended for that cord, secure it as directed by the manufacturer, and inspect its tension. Gently test the completed bracelet before use.
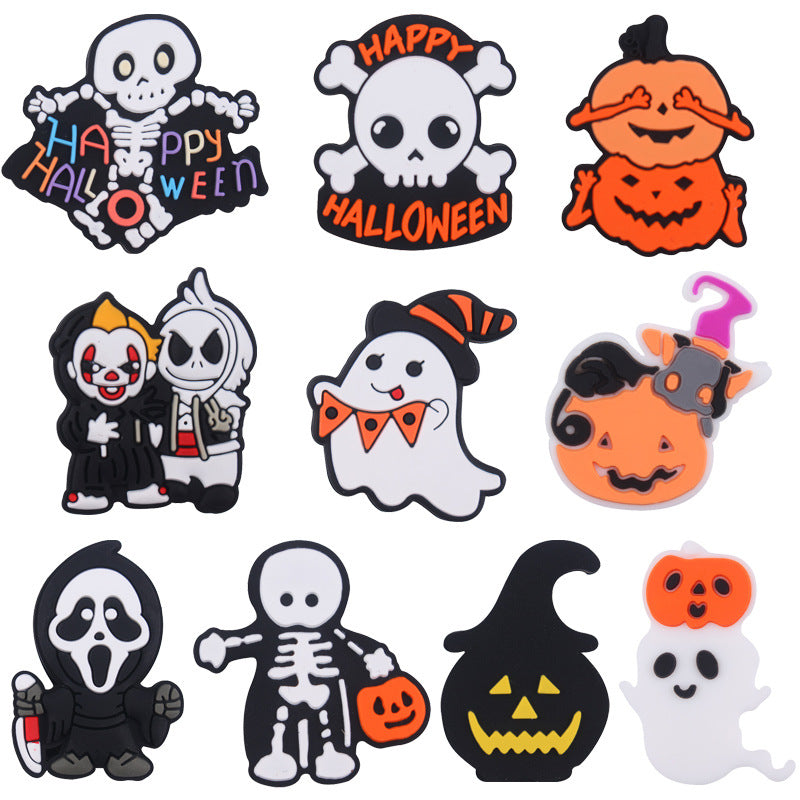
The photographed pumpkin acrylic beads show a Halloween face design. The Halloween silicone focal beads offer larger motifs, but the supplied front-facing product photograph does not establish hole orientation or compatibility with your bracelet cord. Verify those details before using them in this project.

How Do You Make a Halloween Charm Necklace?
If you plan to hang several Halloween charms, start with a paper or tabletop layout of the center point and the intended spacing. A single ghost pendant is usually a simpler first build than a necklace containing five different charms, because every additional component introduces another opening, connector, and orientation to check. Place the heaviest motif near a central supported location rather than assuming any chain will carry it comfortably. When components are asymmetric, test how the necklace hangs before you commit to final placement. Color combinations can be changed later; connector strength and fit have to be considered from the beginning.
A chain and a cord may require different finishing methods. A chain can be attached to a suitable clasp with compatible metal findings, while a cord may use cord ends, a compatible knot, or a clasp system intended for that cord. Do not present any one closure as universally correct. Inspect each purchased part, then assemble using instructions for the exact material. If you are assembling gifts for several people, measure each intended length separately instead of treating one size as suitable for every wearer. A necklace that lies flat on a table can still twist or sit incorrectly when worn, so perform a final wear-position inspection before packing it.
A beginner necklace can be made with a light pendant or a small group of compatible charms, a chain or cord, a clasp if needed, and matching jump rings or bails. First decide whether you want one central pendant or several spaced charms; this determines the connector layout.
- Choose a chain or cord appropriate for the intended wearer and pendant weight.
- Check whether each charm has a loop, a drilled hole suitable for a bail, or another documented attachment method.
- Open a jump ring sideways with two pliers, then connect the charm to the chain or a suitable bail.
- For multiple charms, lay the necklace flat and plan the spacing before fastening each point.
- Confirm that the clasp operates correctly, the chain lies comfortably, and all connecting rings close completely.
A hanging charm is not the same thing as a bead: some Halloween pieces have a top loop, while others must be threaded or incorporated into an entirely different construction. Never force a component onto incompatible findings.
Can You Make Halloween Jewelry with Italian Charms?
This distinction matters because a rectangular module's decorative face can resemble a miniature charm while its construction is entirely different. Ordinary hanging charms depend on loops or holes, and strung bracelets depend on the passage of a cord through drilled beads. The Italian module instead belongs to a mechanically linked bracelet. Before buying, identify the starter system, nominal width, and tools required by that exact system. If you already own a bracelet, compare its link system with the new component rather than relying on the word "Italian" alone.
For a seasonal Halloween update, first make sure the existing bracelet is comfortable and in good condition. Plan which compatible links will be replaced or added, and work over a covered surface where small modules cannot disappear. Follow the system's instructions for opening the expandable links and inserting the module; do not force a piece that will not seat properly. After assembly, verify that the links return to their correct position and that the decorated faces align. This is an independent project path rather than a shortcut within the elastic-bracelet tutorial.
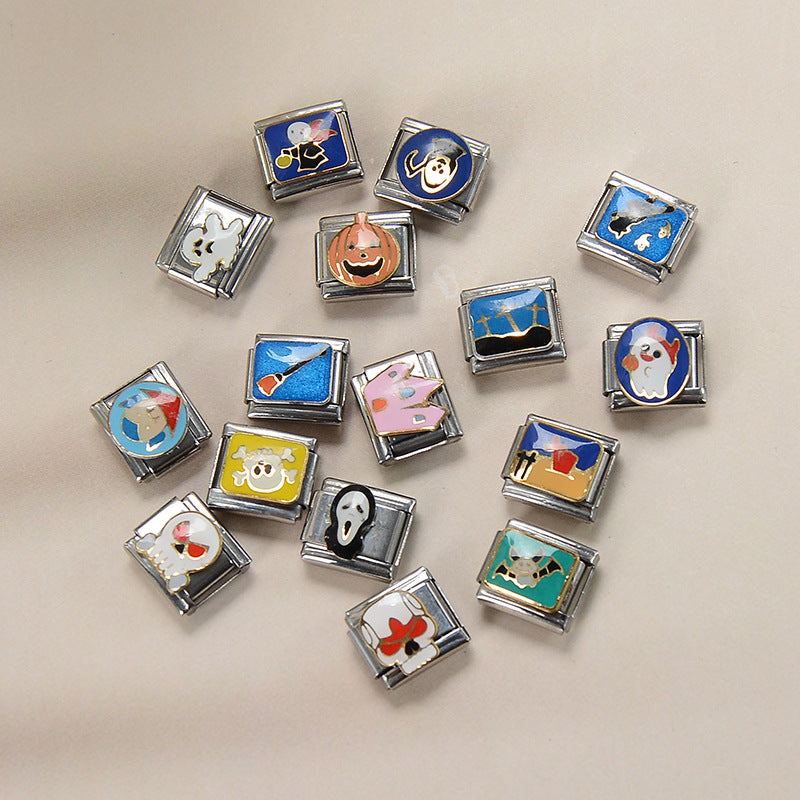
Yes, but use the right assembly system. A 9 mm Italian charm is typically a rectangular module designed to connect to compatible expandable bracelet links. It is not a loose pendant for an ear hook or a round bead for elastic cord.
The Halloween 9 mm stainless-steel Italian charms shown here are suitable examples for explaining the modular category, not for demonstrating an ordinary bead-stringing technique.
To plan a modular bracelet, first confirm the width and compatibility of the starter bracelet, select enough links for a comfortable fit, and follow the relevant module system's fitting or tool instructions. Do not try to connect these pieces using the earring or necklace steps above.

How Can You Change the Halloween Look?
A simple way to compare designs is to make three sample layouts with identical construction and different focal colors. One can use classic orange and black; another can pair white ghost shapes with purple accents; a third can rely on colorful spiderweb motifs. Keep the same basic material quantities so the differences are visual rather than structural. You can then compare which motifs remain visible on the wrist or when hanging from a necklace. A very large focal component may dominate a short bracelet, whereas small patterns can disappear if they are crowded together.
For sellers, treat style testing as a small design exercise, not proof of a market trend. Photograph one actual completed sample in natural lighting, check that the colors are represented faithfully, and record which parts were used. Keep the photograph distinct from wholesale component images so customers do not mistake loose supplies for a finished bracelet or earrings. A coordinated set may use the same palette for different items, but that does not mean every single charm or bead should be used in every construction method.
For a classic design, alternate pumpkin orange with black beads. For a softer look, try white ghost motifs alongside purple and silver-colored components. Spiderweb patterns can create a different effect: the photographed Halloween spiderweb acrylic beads illustrate this pattern. Candy-shaped beads such as the pictured Halloween bat and skull acrylic candy beads provide another playful material option.
Match the jewelry's scale to the wearer: large beads can make a bold statement but may be too bulky for small earrings. Avoid calling components hypoallergenic, nickel-free, lead-free, or suitable for children unless those claims are explicitly supported by appropriate product documentation.
What Should You Check Before Wearing, Gifting, or Selling Your Jewelry?
Make a short completion checklist for each piece. For earrings, confirm paired weight and orientation, closed rings, finished wire ends, and verified materials at the ear-contact point. For a stretch bracelet, check bead edges, knot security, comfort, and whether the cord returns to its normal fit after gentle movement. For a necklace, check clasp movement, pendant position, and the strain on every connecting point. Record any part that fails a check and replace it instead of concealing a weak connection in packaging. A completed appearance does not prove a secure assembly.
For small sellers, product descriptions should distinguish the materials you know from those you have not independently verified. Do not claim a finished piece is suitable for sensitive skin merely because one purchased decorative bead is acrylic. Nor should you infer material compliance for finished jewelry from decorative packaging alone. Keep supplier descriptions, part identifiers, and any appropriate safety documentation with the batch notes. Requirements can vary by market and the intended age of the wearer; where requirements are unclear, obtain relevant professional or official guidance rather than making reassuring but unsupported labels. These checks support repeatable work and more accurate product pages.
Inspect jump rings for gaps, test clasp operation, and look for sharp wire ends. Check that bead holes do not cut into the cord and that the knot remains secure after a gentle test. If you use clay, resin, coating, or adhesives, follow the manufacturer's handling and curing directions rather than guessing times or safety claims.
Small jewelry components can present choking hazards. Do not provide loose beads, small charms, or fragile handmade jewelry to young children, and use age-appropriate product guidance for any item intended for minors. Anyone selling finished jewelry should verify applicable material, labeling, and product-safety requirements for the destination market before offering the design for sale.
For repeat designs, record the actual materials, finished dimensions, component count, waste, and assembly time. Test one completed piece before purchasing larger quantities. A package count or a product's minimum order quantity is not the same as the number of finished bracelets or pairs of earrings it will produce.
Where Can You Find Halloween Charms and Beads for Repeat Projects?
Build a purchase comparison around the project you actually tested. For example, a bracelet design may require one pack of focal beads plus nonseasonal elastic cord; an earring design may require matched hanging charms and independently purchased ear-contact hardware. Compare the entire list of supplies rather than the displayed price of the Halloween motif alone. In a mixed assortment, count the usable shapes for the specific design. A large pack may look economical but provide only a few matching earring pairs; a smaller uniform pack may fit that project better. The right choice depends on the required finished quantity and usable component count.
If you plan to sell several pieces, write down the bill of materials and actual assembly time after making the first sample. A simple planning calculation is total verified material cost divided by the number of usable finished pieces, with packaging and other applicable costs considered separately. This is a way to organize your own figures, not a claimed Accs product margin or guaranteed output per pack. Confirm the product listing's unit of sale, material, variant, and minimum purchase unit. Availability and shipping costs may change, so use the current checkout information before committing to seasonal inventory.
Once you know which components actually fit your construction method, you can compare materials and pack sizes. Browse Halloween charms and beads for jewelry making at AccsWholesale for seasonal options. The collection also includes other Halloween merchandise, so confirm each listing is a loose component rather than finished jewelry. For nonseasonal alternatives, see the wholesale beads collection.
Compare the total number of usable components, the listed minimum purchase unit, the dimensions, the intended application, and the delivered order cost. An acrylic bead pack and an Italian charm module may both be labeled DIY accessories, but they do not serve the same construction process.
FAQ
What is the easiest Halloween jewelry to make?
A beaded stretch bracelet is often an accessible first project if you have compatible drilled beads and elastic jewelry cord. Follow the cord manufacturer's knot instructions, and check the finished piece before wearing it.
Can I turn any Halloween charm into an earring?
No. You need a suitable attachment loop or other secure method, appropriate weight, and jewelry findings suited to ear contact. Decorative pieces should not be assumed wearable without checking their specifications.
Are Halloween silicone focal beads and acrylic beads interchangeable?
Not automatically. Their sizes, hole configurations, and intended uses may differ. Compare dimensions and check whether each piece fits the chosen cord or finding.
How do Italian Halloween charms attach to a bracelet?
Compatible Italian charm modules connect to a matching expandable-link bracelet system. They are different from hanging charms and drilled beads; follow the starter bracelet and module instructions.
Can I make Halloween jewelry to sell?
Yes, once the design is tested and the relevant selling, labeling, and product-safety requirements are checked. Track material costs and production time before deciding whether the finished item is suitable for resale.
Final Answer
To make Halloween jewelry, choose a project first—charm earrings, a beaded bracelet, or a charm necklace—then select components that are physically compatible with its hooks, cord, chain, and connectors. Assemble the parts carefully, secure every joint, and inspect the finished piece. Use a separate compatible link system for Italian charms. For repeated projects, test a sample before ordering materials in quantity.
Explore Halloween Jewelry-Making Components
If you have already tested a design and know which components fit, review seasonal beads and charms before planning a repeat project. Check the intended use, dimensions, material, and minimum purchase unit of each item, then compare what you need for your specific earrings, bracelet, or necklace. AccsWholesale offers a collection that includes Halloween making components alongside other seasonal merchandise; the collection is not a complete jewelry-making kit.
Halloween charms and beads for jewelry makingRelated Posts

How to Make Keychains to Sell: Materials, Steps & Tips
Learn how to make keychains to sell by comparing beadable-bar, cord-and-bead, acrylic, polymer-clay, and resin methods. The guide explains essential...
Read More
How to Make Acrylic Flatbacks: 3 DIY Methods
Learn three practical ways to make decorative flatbacks: decorate pre-cut acrylic blanks, create custom acrylic shapes from sheets with suitable...
Read MoreInvalid password
Enter